Your iPad's Notes App Can Do More Than You Think
Apple Notes is one of those apps that just sits on your iPad, and most people only ever use it for the basics. Quick lists, a phone number, something you need to remember later.
But there's a lot more built into it than most people realise. These are the little features that make Notes far more useful once you know they're there. Here are five tips that I think will make you see the app a little differently.
Tip 1: Record Audio and Have It Transcribed for You
This one is really cool. You can record audio straight into a note, and Notes will transcribe it automatically. It can even summarise the recording for you.
- Open the Notes app and start a new note.
- Tap the paperclip icon at the top and choose Record Audio.
- Tap the red button to start recording, then tap it again to stop.
- Resume to keep recording, play it back, or tap Done when you're finished.
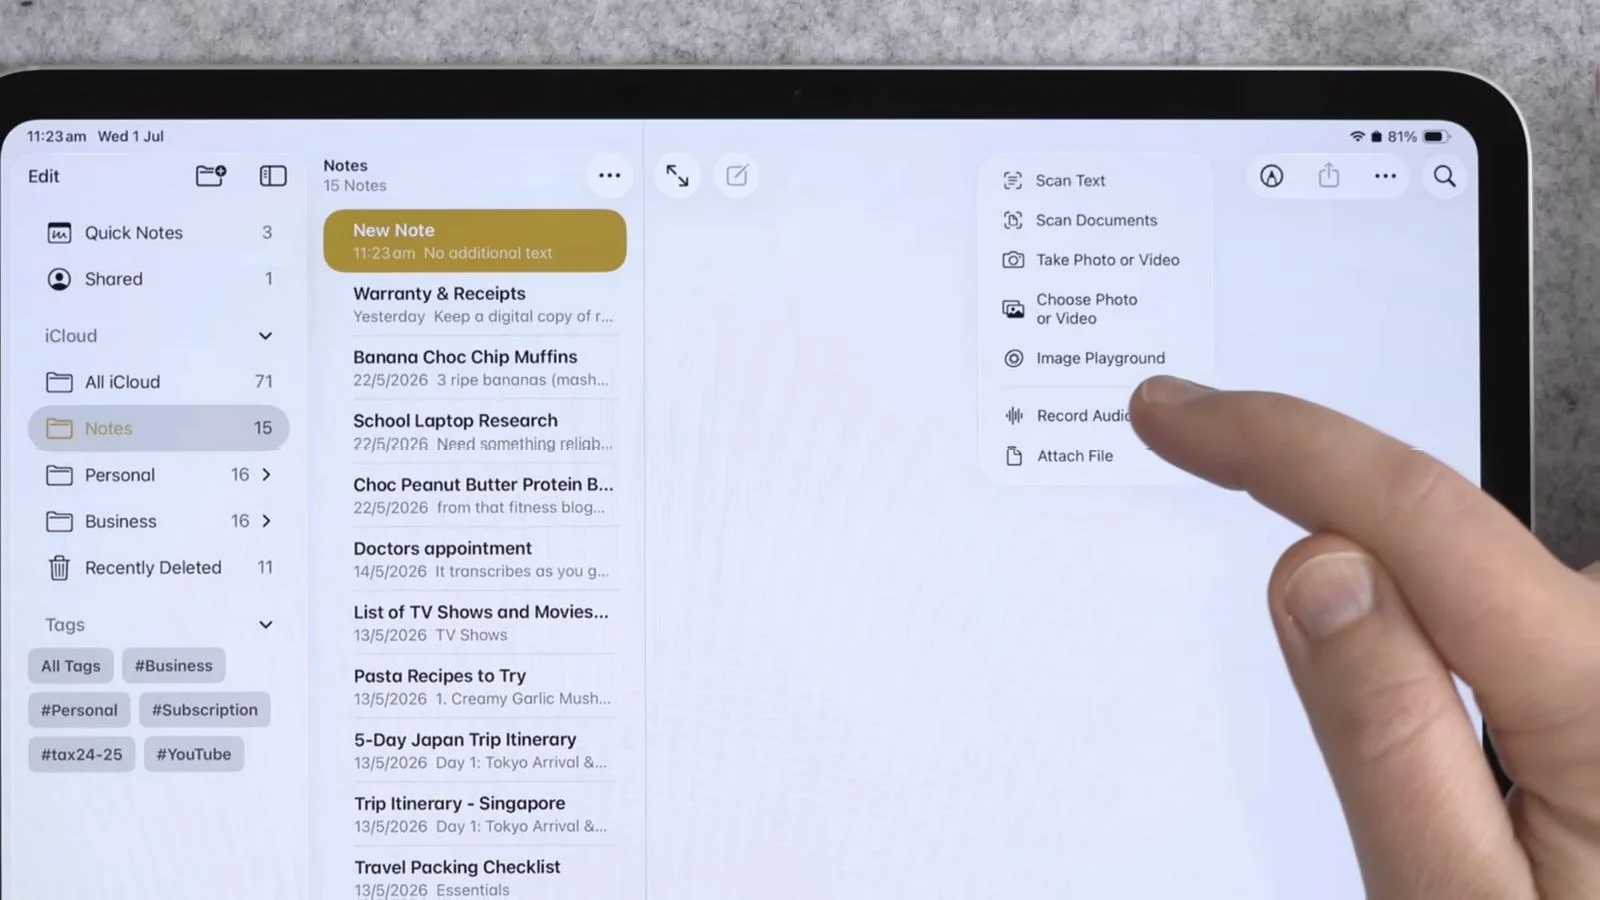
From the recording screen you can view the transcript and tap the summary icon to get a quick summary. You can copy or share that summary, which is handy if you want to email it to someone.
Once you tap Done, the recording sits at the top of your note as a card. You can play it back, tap it to review the transcript, and keep typing your own notes underneath.
Press and hold the recording card for some quick actions:
- Rename the recording
- View the summary
- Add more to the recording
- Save the audio to the Files app on your iPad
If you're recording something longer, like a 30 minute or hour long meeting, use Find in Transcript to search for keywords and jump straight to the part you need. You can also add the full transcript into the note itself. Meetings are the obvious use, but there are plenty of others too.
Tip 2: Scan Documents and Receipts Straight Into Notes
Need a copy of a document or a receipt? Scan it straight into a note. That makes it easy to search for and refer back to later, and you can do plenty with it once it's there.
- Open a note and tap the paperclip icon.
- Choose Scan Documents. Your camera opens.
- Line up your document and capture it. For a document with several pages, keep capturing and they'll all be added together.
- Tap the little preview image to make any edits before saving.
In the edit view you can crop out anything around the edges, rotate or delete a page, and choose a filter:
- Colour (the default)
- Greyscale, for that scanned look
- Black and White, like a really old scanner
- Photo
Tap the tick when you're happy, and the scan is inserted into your note.
Rename and Manage Your Scan
Notes gives the scan a name based on what it sees in the image. Tap the name to change it to whatever you like.
Tap Show Thumbnail, then tap the scan, to scan more pages, insert pages from the Files app, add a blank page, crop, or change the filter.
The dropdown arrow next to the scan lets you view it as large, medium or small. Small is handy when a note has a lot of other information in it, and you can still tap it to open the full scan.
Share and Mark Up
Tap the share icon to email the scan to someone or save it to Files.
To highlight or circle something, tap the dropdown arrow, choose Quick Look, then tap the markup icon. Pick the highlighter or any pen you like, mark up the page, and save.
Tip 3: Save Screenshots to Notes With a Bit of Context
I think a lot of people will relate to this one. You take a screenshot and it just sits in your Photos app forever. Instead, pop it straight into a note, add some context, and you'll find it so much easier later.
Say you're shopping for a new couch on the IKEA website and want to save one you like.
- Take your screenshot as usual.
- Tap the screenshot preview, then tap the share icon.
- Choose Notes.
- Pick New Note, or add it to a note you've already made.
- Add some text before you save. I like to use dictation for this, something like "I really like this couch. The colour is nice, the price is good, and it's in stock now."
- Tap Save.
Open the Notes app and your new note is waiting. From here you could add a heading like "New couch options" and collect all your research in one place.
Press and hold the screenshot to change its size. Making it small keeps the note tidy, and you can still tap it to open it full size. Tap into the screenshot and use the markup icon to draw on it, then save and the changes carry across into your note.
You can also link back to the page you found it on. In your browser, tap the share icon and choose Copy to copy the page link, then paste it into your note. I use Arc, so Safari looks a little different, but just look for the share icon.
It makes that screenshot far more helpful than leaving it in Photos.
Tip 4: Link One Note to Another
If you have a lot of notes, you can link them together so you can jump between them quickly.
- Tap into your note where you want the link.
- On the keyboard, tap the 123 key, then tap the #+= key for more symbols.
- Type two greater than symbols (>>).
- A list of your most recent notes pops up. If the one you want isn't there, start typing its name.
- Tap the note to add the link.
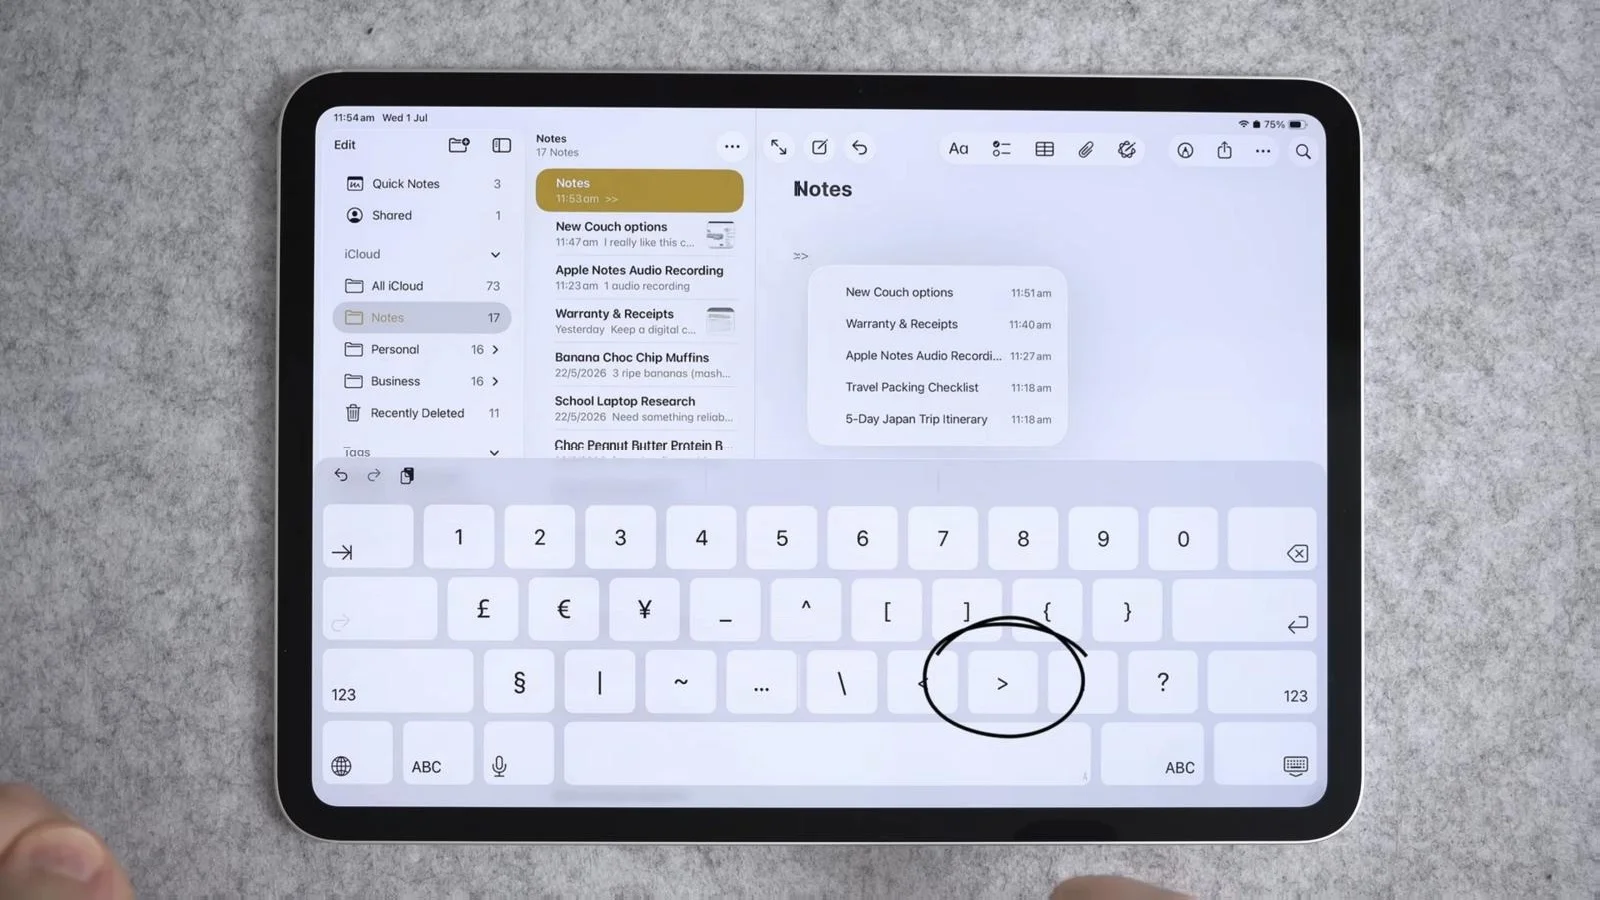
Once your notes are linked, just tap a link and that note opens straight away.
One idea I love is a homepage for all your recipes. Make a note called Recipes, link every recipe note to it (like my banana chocolate chip muffins), and you can find any of them in a couple of taps.
Tip 5: Lock Your Private Notes
If a note has something private in it, you can lock it so only you can open it with your passcode, Face ID or Touch ID.
- Press and hold the note in your notes list.
- Tap Lock Note.
- Confirm with Face ID (or Touch ID, or your passcode).
The little lock icon at the top shows whether the note is unlocked. Tap it to lock the note again. Anyone can still browse your other notes, but this one stays hidden until you unlock it.
Choose How You Unlock
You don't have to use Face ID. Go to Settings > Apps > Notes > Password and you can choose to:
- Use your device passcode
- Use a custom password
- Turn Face ID on or off alongside your password
- Change your custom password
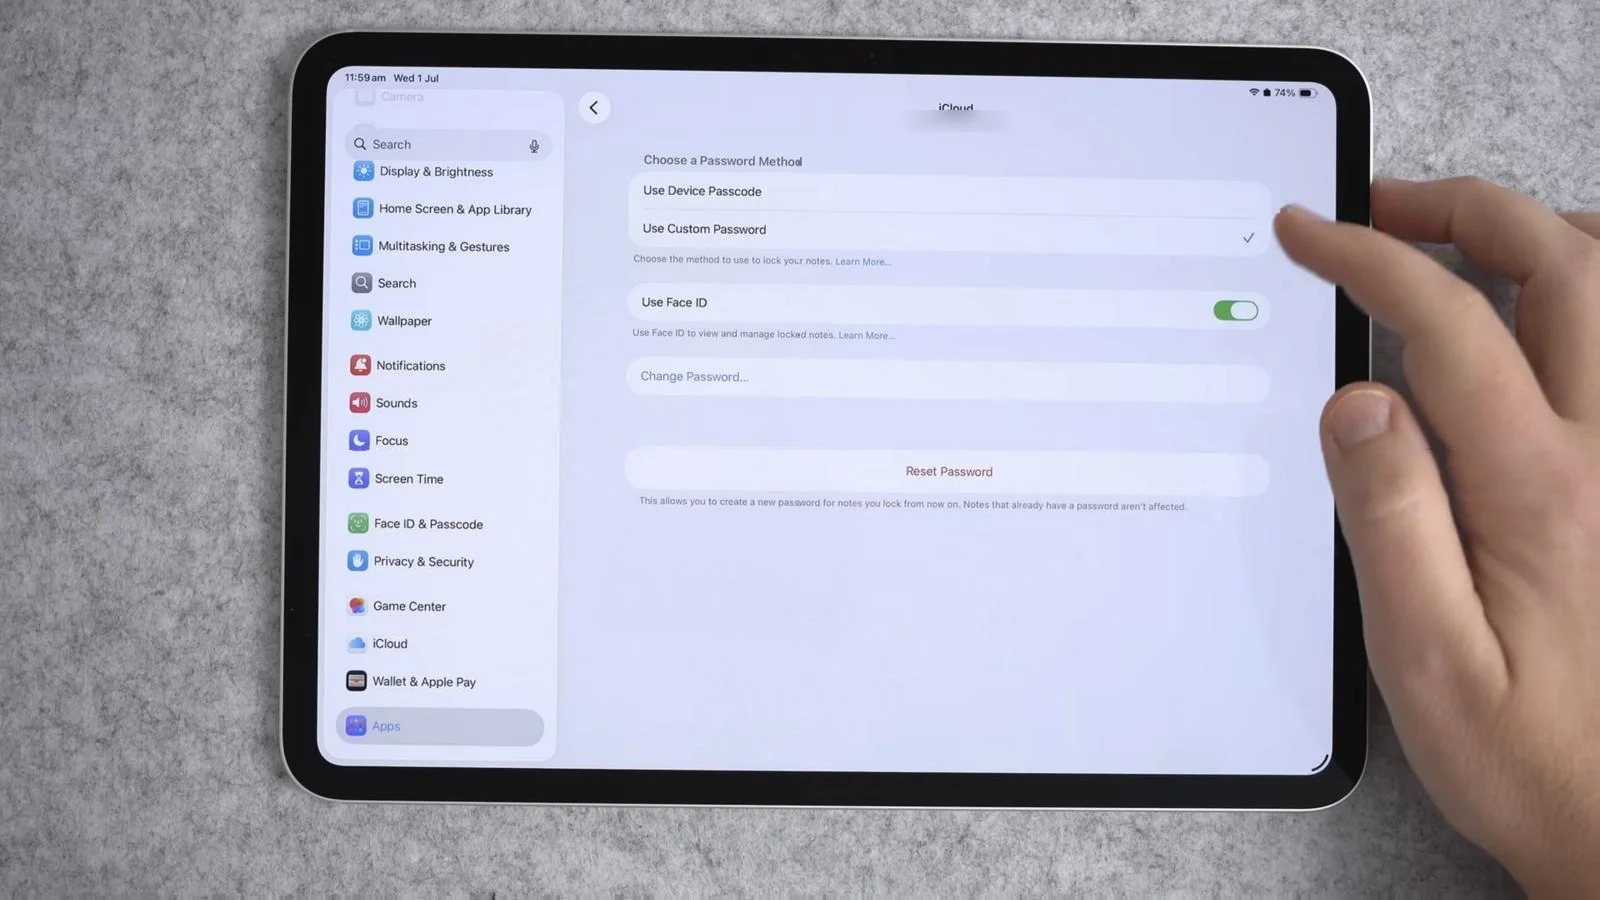
I've set mine up with a custom password plus Face ID. That way Face ID unlocks it most of the time, and I can type my password if I need to.
I use this one for my gift lists, just in case my kids get hold of my iPad. I don't want them seeing what they're getting for Christmas!
To remove the lock, press and hold the note, tap Remove Lock, and confirm with Face ID or your passcode.
Watch the Full Video
If you'd like to see each of these tips in action, you can watch the full video below.